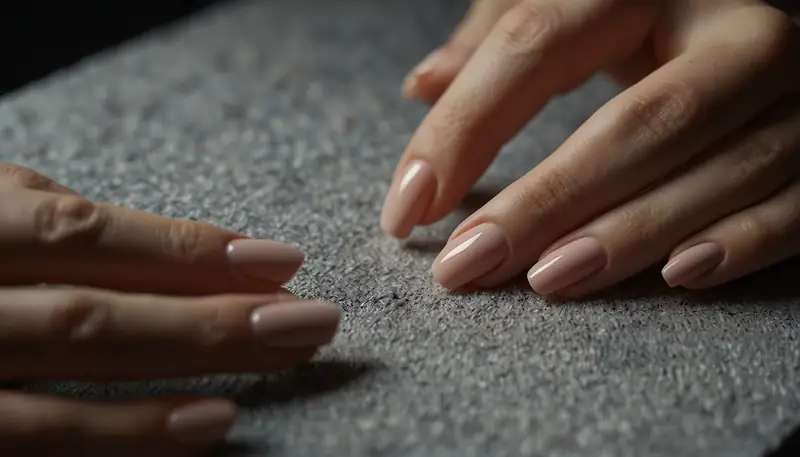
Almond nails have become the go-to shape for anyone seeking an elegant, flattering, and versatile nail style. Whether you want to grow out your natural nails or master shaping techniques for future manicures, learning how to shape almond nails at home: a step-by-step guide is a game-changer. This shape elongates your fingers, works with various nail designs, and consistently looks chic, whether you prefer minimalist or bold aesthetics.
The good news? You do not need expensive salon visits to achieve perfectly shaped almond nails. With the right tools, knowledge, and a bit of practice, you can create professional-looking results in your own home. This comprehensive guide walks you through everything you need to know, from selecting the perfect filing tools to mastering techniques that keep your nails looking salon-perfect.
Why Almond Nails Are the Perfect Shape
Almond nails have dominated the beauty industry for good reason. This shape features a rounded apex that tapers to a pointed tip, creating an elongated silhouette that flatters virtually all hand shapes and sizes. Unlike square nails that can look boxy or coffin nails that require more care, almonds strike the perfect balance between elegance and practicality.
The almond shape is particularly flattering because it creates the illusion of longer fingers and thinner hands. It also provides enough space for nail art while maintaining structural integrity. Whether you are heading to a professional meeting, attending a special event, or want everyday nails that look polished, almond nails deliver on all fronts.

Benefits of the Almond Nail Shape
- Flatters all hand shapes and skin tones
- Creates an illusion of longer, slimmer fingers
- Versatile canvas for nail art designs
- Works with any nail length preference
- Less prone to breaking than pointed or stiletto shapes
- Suits both professional and casual settings
- Easy to maintain at home with basic tools
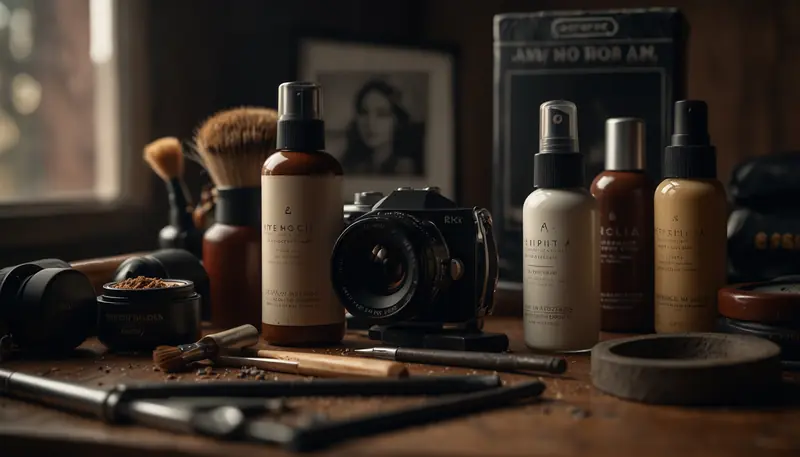
Essential Tools and Materials You’ll Need
Before you begin shaping your almond nails, invest in the proper tools. Quality equipment makes the process easier, faster, and delivers better results. You do not need an extensive collection; a few essential items will set you up for success.
The most important tool is a high-quality nail file. Different file types and grits serve different purposes, so understanding your options helps you choose wisely. Additionally, having complementary tools ensures you can complete the entire process smoothly, from initial shaping to finishing touches.
Must-Have Nail Shaping Tools
- Glass or Crystal Nail File: Better than metal files because they seal the keratin at the nail edge, preventing splitting and peeling. They last longer and work on natural and artificial nails.
- 180-240 Grit File: Ideal for shaping and removing length. A finer grit (220-240) works best for natural nails.
- Nail Buffer: A 3-way or 4-way buffer helps smooth the nail surface and create shine. Use it after filing to eliminate rough edges.
- Cuticle Pusher: Essential for prepping nails and pushing back cuticles to see your true nail shape.
- Nail Clippers: Helpful for removing significant length before filing, especially on very long nails.
- Cuticle Oil or Nail Oil: Keeps nails hydrated and healthy during the shaping process.
- Nail File Guide or Stencil: Optional but helpful, especially when learning, as it ensures consistent almond angles.
Invest in tools made from quality materials. A good glass file costs slightly more upfront but lasts years longer than cheap metal ones. Your nails will thank you with healthier, stronger growth and fewer breakage issues.
How to Prepare Your Nails Before Shaping
Proper nail preparation is crucial for successful shaping. Starting with clean, moisturized, and properly assessed nails ensures you work with the best canvas possible. Taking time with this step prevents mistakes and creates an ideal foundation for your almond shape.
Do not rush the preparation phase. A few minutes of prep work saves hours of frustration and prevents damage to your nails. Clean nails are easier to file precisely, while hydrated nails are less likely to split or break.

Step-by-Step Nail Preparation
Step 1: Remove Any Polish Start with clean nails by removing any existing nail polish. Use a gentle, acetone-free remover if possible, as acetone can dry out your nails excessively. Allow nails to air dry completely before proceeding.
Step 2: Soak Your Nails Soak your fingertips in warm water for 5-10 minutes. This softens the nail plate, making it easier to file and shape. You can add a drop of cuticle oil or a bit of hand soap to the water. Pat your nails dry gently after soaking.
Step 3: Push Back Cuticles Using a cuticle pusher, gently push back your cuticles. This reveals your true nail shape and prevents the cuticle from interfering with your filing. Be gentle and never force cuticles; they are delicate tissue protecting your nail base.
Step 4: Assess Your Starting Length Look at your nails objectively. Almond nails work best when there is enough length beyond the finger. For beginners, aim for at least a quarter-inch of nail extending past your fingertip. If your nails are very short, you may want to grow them out first.
Step 5: Trim Excess Length if Needed If your nails are significantly longer than your desired almond shape, use nail clippers to remove length first. This is faster than filing from very long nails and prevents excessive tool wear. Leave enough length for filing and shaping.
Step 6: Apply Cuticle Oil Before shaping, apply a small amount of cuticle oil to your nails. This lubricates the nail surface, making filing smoother and reducing friction that can cause breakage or peeling.
Step-by-Step Process to Shape Almond Nails
Now comes the main part: shaping your nails into beautiful almond shapes. This process requires attention to detail and consistent technique, but once you master it, you will achieve results that rival professional salons. The key is working carefully, filing one nail at a time, and checking your progress often.
Remember that patience is essential. Rushing through the filing process often results in uneven shapes, over-filed edges, or broken nails. Taking your time ensures better results and protects your nail health in the long run.
The Complete Almond Shaping Technique
Step 1: Establish Your Guideline Start by establishing the basic nail length and shape. File straight across the top of your nail to create a slight point in the center. This guideline helps you maintain symmetry as you shape the sides. Keep your file at a 45-degree angle to the free edge.
Step 2: Shape the Right Side Hold your file at a 45-degree angle and file from the outer right corner toward the center point you created. Use long, smooth strokes in one direction (file upward from the nail edge). This creates the right side slope of your almond shape. Make multiple passes, checking often to avoid over-filing.
Step 3: Shape the Left Side Mirror the right side by filing the left side at the same angle. Work from the outer left corner toward the center point. The goal is symmetry, so keep comparing both sides as you file. Even slight differences become noticeable on fully shaped nails.
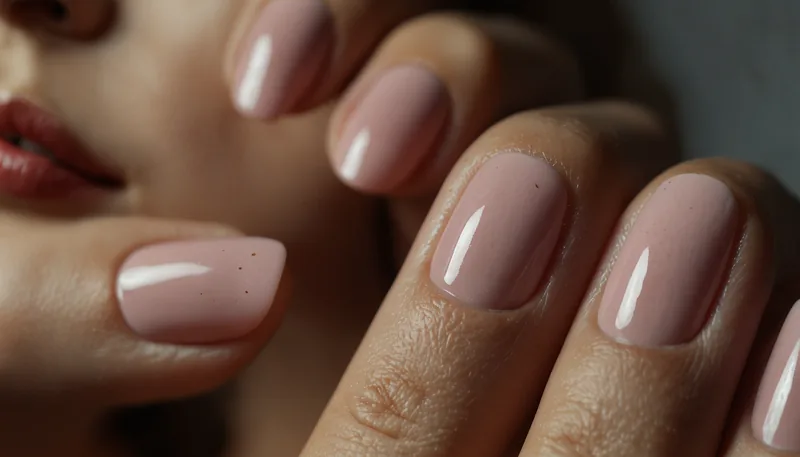
Step 4: Refine the Point Work toward a subtle point at the center, but do not make it too sharp. An almond nail should have a refined point that looks elegant, not dramatic. The point should be slightly rounded rather than extremely sharp, making the nail more durable and comfortable.
Step 5: Check for Symmetry Examine your nail from directly above and from the side. The almond shape should look balanced, with the point centered on your nail. If one side looks rounder or wider than the other, make subtle adjustments using gentle filing motions.
Step 6: Move to the Next Nail Repeat the process for each nail. Work on one hand completely before moving to the other. Many people find it helpful to shape nails on their dominant hand first while they still have focus and energy.
Step 7: Smooth the Edges Once all nails are shaped, use your buffer to smooth the filed edges and create a slight shine. Buff gently in one direction to seal the keratin and create a finished look. This step is crucial for preventing nail splitting.
Step 8: Final Polish and Hydration Apply cuticle oil generously to all nails and massage gently. This hydrates your nails after the filing process and helps them settle into their new shape. You can now apply base coat, polish, or nail art if desired.
Pro Tips for Perfect Almond Shaping
- File in one direction only, not back-and-forth. This prevents peeling and splitting.
- Keep your file at a consistent 45-degree angle throughout the process for uniform shapes.
- Use light pressure when filing. Let the file do the work rather than forcing it.
- Check your progress often by looking at your nail from different angles.
- Work on one nail completely before moving to the next nail to maintain consistent technique.
- If you make a mistake, file that nail shorter and use it as a guide for others.
- Different nails may naturally have slightly different shapes; subtle variations are normal and acceptable.
- Take breaks if your hand becomes tired. Fatigue leads to uneven filing.
Common Mistakes to Avoid When Shaping Almond Nails
Learning what NOT to do is just as important as knowing the correct technique. Many nail shaping mistakes happen on the first try, but understanding these pitfalls helps you avoid them. Your nails will be healthier, and your shapes will look more professional when you sidestep these common errors.
Mistakes That Ruin Your Almond Nails
Mistake 1: Using the Wrong File Type Metal files create micro-tears along the nail edge, leading to peeling and splitting. Only use glass or crystal files on natural nails. Metal files are acceptable only for acrylic or gel nails, but even then, glass files are gentler.
Mistake 2: Filing Back and Forth This creates ridges and weak points that lead to breakage. Always file in one direction only, from the outer edge toward the center. This seals the keratin and creates a strong edge.
Mistake 3: Creating Too Sharp a Point While the almond shape features a point, making it too sharp compromises durability. The point should be refined and elegant, not needle-like. A slightly rounded point looks better and breaks less easily.
Mistake 4: Inconsistent Angles If you change your filing angle mid-nail, you will end up with uneven sides and an awkward shape. Maintain a consistent 45-degree angle throughout the entire filing process for each nail.
Mistake 5: Over-Filing One Side It is easy to file more on one side without realizing it, creating asymmetry. Check frequently and make multiple small passes rather than few aggressive ones. Step back and assess from different angles regularly.
Mistake 6: Skipping the Buffing Step Buffing smooths your edges and seals the nail keratin, preventing peeling. Never skip this step; it takes just minutes but makes a huge difference in your nails’ longevity and appearance.
Mistake 7: Not Moisturizing After Filing Filing removes moisture from nails. Not applying oil or cuticle cream afterward leaves nails dry and brittle. Always finish with hydrating products to keep nails healthy and flexible.
Mistake 8: Trying to Perfect Imperfect Nails If one nail is significantly shorter than the others due to breaking, use it as your guide and file the others to match. Trying to force a nail into the ideal shape when it is too short often leads to over-filing and further damage.
How to Maintain Your Almond Nail Shape
Achieving the perfect almond shape is just the beginning. Maintaining that shape requires constant care and regular upkeep. With proper maintenance routines, your nails will keep their beautiful almond form for weeks, making your at-home manicures look professionally maintained.
The key to maintaining almond nails is addressing growth and damage promptly. As nails grow, they gradually lose their shaped appearance unless you file them regularly. A quick five-minute touch-up every week or two keeps your nails looking fresh and salon-perfect.

Weekly and Monthly Maintenance Routine
Weekly Maintenance Check your nails every few days. If you notice the shape becoming rounded or slightly misaligned, do a quick touch-up. Use your file to gently reshape any nails that are drifting from the almond form. This takes only minutes but prevents needing a complete reshaping later.
Bi-Weekly Shaping Session Every 10-14 days, do a complete filing and maintenance session. File all nails consistently, buff the edges smooth, and apply cuticle oil. This keeps your shape perfect and maintains nail health and hydration.
Monthly Deep Care Once a month, give your nails extra attention. Do a full soak, push back cuticles, remove any ridges with buffing, apply a nourishing nail mask or oil treatment, and reshape as needed. This intensive care keeps nails strong and maintains the beauty of your almond shape.
Damage Prevention Protect your nails from breaking by wearing gloves during household chores, avoiding using nails as tools, and being careful during activities that stress your hands. Prevention is always easier than repair.
Products That Keep Almond Nails Healthy
- Cuticle oil or jojoba oil for daily hydration
- Nail strengthening polish or treatments
- Gentle nail polish remover (acetone-free preferred)
- Moisturizing hand cream for overall hand health
- Base coat to protect nails during polish wear
- A good quality glass file for regular touch-ups
If you are interested in nail art to enhance your almond shape, How to Do Ombre Nails at Home: Complete Step-by-Step Guide for Beginners offers creative design options that beautifully showcase almond-shaped nails.
Styling Ideas for Your New Almond Nails
Once you have mastered shaping your almond nails, it’s time to have fun with styling. The almond shape is incredibly versatile, working with minimalist designs, bold colors, nail art, and everything in between. Your beautifully shaped nails deserve to be showcased with styles that complement their elegant form.
Design Ideas for Almond Nails
- Classic French Tips: A timeless look that highlights the almond shape’s elegance and works for any occasion.
- Solid Colors: From nude and blush to bold reds and deep jewel tones, solid colors showcase the shape beautifully.
- Gradient and Ombre: How to Do Ombre Nails at Home: Complete Step-by-Step Guide for Beginners teaches this sophisticated technique perfect for almond shapes.
- Minimalist Line Art: Simple geometric lines, dots, or metallic accents on a neutral base.
- Seasonal Designs: Explore Acrylic Nails Ideas 2026: Simple, Short, French Tip & Seasonal Designs for inspiration.
- Glitter Accents: Add sparkle to a few nails while keeping others neutral for balanced elegance.
- Nude with Statement Accent: Keep most nails neutral and create a bold design on one or two nails.
- Marble Effect: Create a luxe look with marble or agate designs on your almond-shaped base.
- Negative Space: Leave parts of the nail bare, creating modern, artistic designs.
- Chrome and Metallic: Mirror-finish or chrome effects that slide across your nail surface.
The beauty of almond nails is that they are forgiving. The shape itself is elegant enough to look great with just a fresh neutral polish, but it also provides an excellent canvas for creative designs and bold statement colors.
When to Seek Professional Help
While home nail shaping is absolutely achievable, sometimes professional help is the better option. Knowing when to visit a salon prevents frustration and ensures that your nails stay healthy and beautiful.

When to Visit a Professional Nail Technician
- Starting from Very Long Nails: If your nails are significantly longer than your desired almond shape, a professional can remove length safely and shape efficiently.
- Severely Damaged Nails: If multiple nails are broken, peeling, or damaged, a pro can assess the situation and recommend treatments.
- Nail Health Concerns: If you notice discoloration, ridging, or other concerning changes, a professional can diagnose issues.
- First Time Shaping Almond Nails: Getting a professional almond shape first gives you a template to maintain at home.
- Special Events: For important occasions, professional manicures provide polished, flawless results with nail art.
- Time Constraints: If you are busy and do not have time for home maintenance, regular salon visits keep your nails perfect.
- Difficulty Achieving Symmetry: If you struggle with consistent shaping despite practice, a pro can help while teaching technique.
Remember that learning at home builds skills that serve you forever. Even if you occasionally visit a salon for special occasions or maintenance, home shaping saves time and money throughout the year.
Building Your Nail Care Confidence
Shaping almond nails at home is a skill that improves with practice. Your first attempts might not be perfect, and that’s completely normal. Each time you shape your nails, you develop better muscle memory, understand your personal technique better, and achieve more consistent results.
Do not be discouraged if your first almond nails are not salon-perfect. Focus on the learning process, invest in quality tools, and keep practicing. Within a few sessions, you will be amazed at how professional your at-home manicures look. You can save hundreds of dollars annually while enjoying the satisfaction of creating beautiful nails yourself.
For those interested in exploring other nail shapes and styles, Short Nails Square Simple: Cute & Easy Design Ideas and Simple Short Nails That Are Low-Maintenance but Stylish offer alternative options. Additionally, 10 Short Nail Care Tips: How to Keep Short Nails Healthy and Clean provides comprehensive guidance for nail health regardless of your preferred shape or length.
Final Thoughts on Mastering Almond Nail Shaping
Shaping almond nails at home is an achievable goal for anyone willing to learn proper techniques and invest in quality tools. This elegant nail shape flatters virtually everyone and provides a beautiful canvas for endless styling possibilities. With the step-by-step guidance in this article, you have everything needed to achieve salon-quality results from home.
Start with high-quality tools, particularly a glass nail file, and approach each shaping session with patience and attention to detail. Remember that consistency matters more than perfection. Regular maintenance keeps your almond nails looking fresh between complete reshaping sessions. As you practice, you will develop confidence and skill, making the entire process faster and easier.
Your beautifully shaped almond nails are just the beginning. Explore different nail art styles, experiment with colors, and enjoy the confidence that comes from having perfectly manicured nails. Whether you prefer understated elegance or bold statement designs, your almond-shaped nails will look gorgeous and professional. Start your almond nail journey today and discover how rewarding at-home nail care can be.