Press-on nails offer convenience, style, and flexibility for anyone wanting gorgeous manicures without the commitment of salon appointments. Whether you’re wearing extra short press-on nails for small nail beds or full-length glamorous designs, there comes a time when you need to remove them. The key to maintaining healthy natural nails is learning the proper removal technique. Many people damage their natural nails by pulling, prying, or forcing press-ons off without preparation or patience.
In this comprehensive guide, we’ll walk you through exactly how to take off press-on nails safely, protecting your natural nail bed and cuticles in the process. You’ll discover professional-grade techniques used by nail technicians, the essential tools you’ll need, and critical aftercare steps to restore your nails to their healthiest state. Whether you’re a first-time press-on nail wearer or an experienced beauty enthusiast, these methods will help you maintain beautiful, strong natural nails for years to come.
Why Safe Removal Matters for Your Natural Nails
Your natural nails are living tissue that require proper care and respect. When you wear press-on nails regularly, you’re applying adhesive and pressure to the nail plate, which can stress the keratin structure underneath. Improper removal technique can cause peeling, splitting, brittleness, and damage to the nail bed that takes weeks to heal. Understanding why safe removal matters helps you appreciate the importance of taking your time with the process.
The natural nail is composed of layers of keratin protein. When adhesive bonds press-on nails to your natural nails, it creates a strong connection. Forcing or prying off nails can strip away the top protective layers of your natural nail, exposing the vulnerable layers beneath. This damage appears as white spots, ridges, peeling, or thinning. Additionally, aggressive removal can irritate the cuticle and nail fold, leading to inflammation and infection risks. Taking time for safe removal prevents these complications and keeps your nails healthy.
Many people don’t realize that their nail damage comes from removal mistakes, not from wearing press-ons themselves. When done correctly, press-on nails are a low-commitment beauty option that actually allows your natural nails time to rest compared to frequent salon visits. The secret is mastering the safe removal process.
What You’ll Need: Essential Tools and Materials
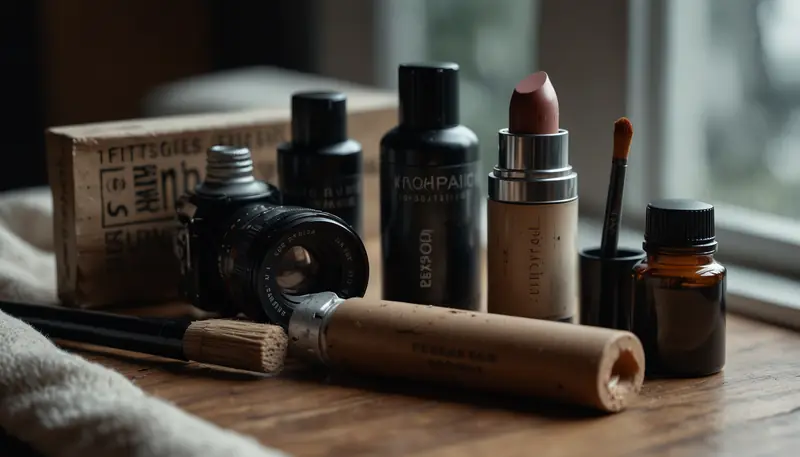
Before you start removing your press-on nails, gather all necessary supplies. Having everything ready ensures you won’t get frustrated mid-process and resort to dangerous methods. Professional nail technicians always prepare their workspace completely before beginning any removal procedure. You don’t need expensive tools—many items you likely already have at home will work perfectly.
Essential Removal Tools
- Acetone or rubbing alcohol (acetone works faster but is stronger)
- Warm water and gentle soap
- Wooden nail file or metal nail file
- Cuticle pusher or wooden stick (never use metal directly on nails)
- Cotton pads or nail wraps
- Small bowls for soaking
- Nail clippers for trimming edges
- Cuticle oil or hand moisturizer
- Clean towels or lint-free paper towels
If you prefer avoiding acetone due to its strong smell or potential drying effects, there are gentler alternatives. Some people use warm soapy water combined with patience, oil-based solvents, or specialized press-on nail removal products from beauty supply stores. While these take longer, they’re excellent options for sensitive skin or if you’re pregnant or nursing.
Workspace Preparation
Set up your removal station in a well-ventilated area, preferably near a window or fan if using acetone. Lay down a towel to protect your work surface and have trash nearby for nail clippings. Organize all tools within arm’s reach so you’re not fumbling around mid-removal. This preparation makes the entire process smoother and more comfortable.
Step-by-Step Guide to Removing Press-On Nails
The safe removal process requires patience and gentleness. Rushing through these steps or skipping stages increases your risk of nail damage. Professional salons dedicate 15-30 minutes to this process, and you should do the same at home. Think of it as a self-care ritual rather than a chore to hurry through.
Step 1: Trim and File the Tips
Start by using nail clippers to carefully trim down the tips of your press-on nails. Cut them down to just slightly longer than your natural nail bed. This reduces the leverage on the adhesive bond and makes them easier to work with. File any rough edges with a gentle sawing motion, creating a slightly beveled edge that’s less sharp and easier to grip.
Work slowly in this step, especially if your nails are long. Avoid cutting too close to the natural nail underneath. You’re essentially shortening the artificial nail to reduce stress on the bond and your natural nail plate.
Step 2: Gently File the Seams
Use a nail file to gently file along the seams where the press-on nail meets your natural nail. This is where the adhesive is strongest. Filing weakens this bond slightly, making separation easier. Work the file along the sides of the nail, gently breaking the seal. Don’t dig into your natural nail—just skim the surface where the two meet.
This step is crucial and separates amateurs from professionals. Taking time here prevents you from having to force the nails off later. Many people skip this and pay the price with damaged nails.
Step 3: Soak Your Nails
Fill a bowl with warm (not hot) water mixed with acetone or rubbing alcohol. If using the gentler method, use warm soapy water with a few drops of cuticle oil. Place cotton pads or nail wraps soaked in your chosen solution directly on each nail, or soak your fingertips in the bowl for 10-20 minutes depending on the method. This waiting period is essential—it allows the adhesive to soften gradually.
Some nail artists recommend applying acetone-soaked cotton and wrapping each finger in foil for 15 minutes to create a concentrated treatment. This method works faster and more effectively, especially for stronger adhesives. You’ll notice the nails beginning to feel looser and less secure during this time.
Step 4: Test and Gently Lift
After soaking, gently test one nail by carefully lifting the edge with a wooden cuticle pusher or nail file. Don’t use metal directly on your natural nail—wood is gentler and won’t cause scratches. If it feels firmly stuck, soak a bit longer. You should feel the adhesive weakening and the nail beginning to naturally separate.
Work slowly around the edges and sides of one nail at a time. Once you feel significant looseness, gently continue lifting. If you encounter resistance, soak again. Never force or pry aggressively. The goal is for the nail to come off with minimal effort once the adhesive has properly loosened.
Step 5: Remove One Nail at a Time
Once one nail is sufficiently loosened, use your wooden stick to gently continue lifting the edge. Work your way around the perimeter, lifting slightly each time. The nail should eventually pop off with only minimal pressure. If it doesn’t, apply more soaking solution and wait longer. Patience now prevents permanent damage to your nail beds.
After one nail successfully comes off, inspect your natural nail underneath. It should look relatively intact without large amounts of adhesive residue. If your natural nail appears extremely thin or damaged, take extra care with remaining nails and consider gentler removal methods going forward.
Step 6: Remove Remaining Adhesive
Once all press-on nails are off, you’ll likely have adhesive residue on your natural nails. Apply fresh acetone or rubbing alcohol to cotton pads and rub gently to dissolve remaining adhesive. Alternatively, use a soft nail buffer to very gently buff away adhesive, working slowly and carefully. The goal is removing the adhesive without removing layers of your natural nail.
This step requires extreme gentleness. Many people damage their nails during adhesive removal by buffing too aggressively. Light, gentle pressure applied with a soft buffer is all you need. If adhesive is stubborn, soak again rather than scrubbing harder.
Step 7: Clean and Moisturize
Wash your hands thoroughly with warm soapy water to remove any remaining adhesive, acetone, or chemicals. Pat dry completely. This is the final step where many people see amazing results by immediately applying nourishing products. Use a rich cuticle oil or nail strengthening serum on your bare nails and cuticles. Apply hand moisturizer generously. Your nails will appreciate the hydration after chemical exposure and stress.
Common Mistakes to Avoid During Removal
Understanding common removal mistakes helps you avoid the pitfalls that damage natural nails. Many people learn removal techniques through trial and error, damaging their nails in the process. Learning what not to do is just as important as learning proper technique.

Forcing or Prying Nails Off
The biggest mistake people make is getting impatient and forcing nails off before adhesive has properly loosened. This causes the nail plate to peel, split, or tear. If a nail doesn’t come off easily after soaking and gentle lifting, it needs more time. There’s no shortcut. Forcing removes layers of your natural nail and can cause months of growth issues afterward.
Using Metal Tools Directly on Natural Nails
Metal files and tools can scratch and damage your delicate natural nails. Always use wooden or plastic tools when working directly with your natural nail surface. Metal is acceptable for filing artificial nails before removal, but never press metal against your bare nail plate.
Skipping the Soaking Step
Some people try to remove nails by simply filing the edges and lifting them off without softening the adhesive. This rarely works and typically results in forceful removal and damage. The soaking step is non-negotiable for safe removal. It’s what separates successful nail care from nail damage.
Aggressive Buffing of Adhesive Residue
After pressing nails are off, many people aggressively buff their nails to remove adhesive. This removes protective nail layers. Instead, use light, gentle buffing motions or soak nails again to dissolve remaining adhesive with less mechanical stress.
Not Moisturizing After Removal
Acetone and rubbing alcohol are drying agents. Skipping moisturization after removal leaves nails brittle and prone to breaking. Always finish the removal process with generous application of cuticle oil and hand cream. Your nails will thank you with healthier growth and appearance.
Aftercare Tips for Healthy Nails Post-Removal
The removal process doesn’t end when your press-on nails come off. Proper aftercare during the following days and weeks determines whether your nails bounce back healthy or suffer long-term damage. Think of this period as recovery time for your natural nails.
Moisturize Daily
Apply cuticle oil and hand cream multiple times daily for at least one week after removal. Focus on the nail bed, surrounding cuticles, and nail edges. This hydration helps restore moisture lost during acetone exposure and supports healing of any minor damage. Look for products containing nourishing ingredients like jojoba oil, vitamin E, or argan oil. Short nail care tips emphasize consistent hydration as foundational for healthy nails.
Take a Break from Nail Products
Give your natural nails time to breathe and recover before applying new press-ons, polish, or other products. This break allows any minor damage to repair and your nail plate to strengthen. Depending on the condition of your nails after removal, this break might be a few days to a week or longer.
Keep Nails Short and Trimmed
Consider trimming your nails short after removal. Short nails are less prone to breaking and easier to care for. Simple short nails that are low-maintenance but stylish actually offer practical benefits beyond aesthetics. They’re gentler on your natural nails while you’re recovering from press-on wear.
Avoid Water and Harsh Chemicals
For the first few days after removal, minimize contact with water and harsh chemicals. Wear gloves when washing dishes or cleaning. Your nails are temporarily more vulnerable, and excessive water exposure plus chemicals can cause additional stress and peeling.
Assess Nail Health
Examine your nails carefully after removal and during the following week. Look for signs of damage like splitting, peeling, discoloration, or thinning. Minor white spots usually disappear as nails grow. If you notice significant damage, consult a dermatologist or professional nail technician. Some damage requires professional attention and healing time before you can safely wear press-ons again.
Use Nail Strengthening Treatments
Consider using nail strengthening serums or treatments designed to repair and fortify damaged nails. Many excellent products on the market specifically target post-removal recovery. These can significantly improve nail health and strength during the healing period. Apply according to product instructions, typically daily or a few times weekly.
How Long Should You Wait Before Applying New Press-Ons
The timeline for reapplying press-on nails varies depending on your nail condition and how much damage occurred during removal. Some people can safely reapply within days, while others need several weeks. Understanding your nails’ needs helps you make the best decision for long-term nail health.

Minimal Damage Recovery: 3-5 Days
If your removal was successful with minimal damage and your nails look healthy and strong, you can typically reapply press-ons after 3-5 days. This short break still provides recovery time. If you choose to reapply quickly, continue using moisturizing treatments and choose best short glue-on nails for beginners or gentler applications to minimize stress on recovering nails.
Moderate Damage Recovery: 1-2 Weeks
If you notice some peeling, slight splitting, or thinning, wait 1-2 weeks before reapplying. This gives your nails time to recover and helps prevent cascading damage. During this period, focus intensively on moisturizing and use nail strengthening treatments. By the end of two weeks, most moderate damage shows significant improvement.
Significant Damage Recovery: 3-4 Weeks or Longer
If your nails show significant damage including extensive peeling, deep splitting, severe thinning, or nail bed damage, wait 3-4 weeks or longer. Some damage requires a full growth cycle (roughly 3-4 months) to fully resolve. In these cases, give your nails extended breaks between wearing press-ons. Consider alternating between press-on weeks and natural nail weeks to minimize cumulative damage. Explore short press-on nails for everyday wear in lighter weights that apply less adhesive stress.
Signs Your Nails Are Ready for Press-Ons Again
Your nails are ready for new press-ons when they appear smooth, consistent in color, and feel strong. Peeling should have completely stopped. The nail bed should feel firm and not flex easily. There should be no pain or tenderness when pressure is applied. If any of these signs are absent, wait longer before reapplying.
Professional vs DIY Removal: Which is Right for You
You have the option to remove press-on nails yourself at home or visit a professional nail technician. Each approach offers different benefits and considerations. Understanding the pros and cons helps you choose the best option for your specific situation and nail health needs.

DIY Home Removal Benefits
Home removal offers convenience, cost savings, and control over the process. You choose your timing, removal method, and can proceed at your own pace without feeling rushed. For anyone with experience and healthy nails, DIY removal is perfectly safe and effective when you follow proper techniques. You also avoid travel time and exposure to salon chemicals in a concentrated space.
Home removal works particularly well if you have prior experience and understand your nails’ specific needs. Many beauty enthusiasts actually prefer controlling the removal process themselves. The cost savings also add up if you regularly wear press-ons.
DIY Home Removal Drawbacks
Without professional training, you might make mistakes that damage your nails. The temptation to rush or force the process is stronger at home with no professional guidance. You also lack immediate expert assessment if unexpected complications arise or if you’re unsure whether your nails are ready for new applications.
Professional Salon Removal Benefits
Professional nail technicians have extensive experience removing press-on nails safely and efficiently. They understand nail anatomy, use professional-grade products, and can assess your nail health. They can identify damage you might miss and recommend appropriate aftercare or waiting periods before reapplication. For anyone with compromised nails or sensitive skin, professional removal offers valuable peace of mind.
Professionals also handle the mess and chemical exposure, which is particularly beneficial if you’re pregnant, nursing, or have sensitive respiratory systems. They can provide personalized recommendations based on your specific nail type and concerns.
Professional Salon Removal Drawbacks
Professional removal costs money and requires scheduling appointments around salon hours. You’re also depending on the skill level of individual technicians, as quality varies between salons and professionals. Not all nail technicians approach removal with the same care and gentleness.
Best Approach: Hybrid Method
Many experts recommend a hybrid approach: do removal yourself using the techniques detailed in this guide, but have a professional assess your nails quarterly or when you’re unsure about recovery timelines. This combines cost savings and convenience of home removal with professional expertise and oversight. It’s an excellent approach for regular press-on nail wearers concerned about long-term nail health.
Additional Resources for Press-On Nail Care
Expanding your knowledge about press-on nails and nail care helps you make the best choices for your nail health. Several resources can guide you toward optimal nail care practices. Explore different press-on nail styles and options to find products that work best for your unique needs.
For first-time wearers, best short press-on nail kits for beginners provide gentle introduction to press-on wear. These kits typically use lighter adhesive and shorter lengths, reducing stress on natural nails. If you have small nail beds or short natural nails, extra short press-on nails for small nail beds ensure proper fit and comfort. For creative inspiration, acrylic nails ideas 2026 showcases trending designs that work beautifully on press-on options.
Maintaining natural nails between press-on applications is equally important. Learn about why your short nails keep breaking and how to prevent breakage. Understand proper nail care basics with our guide on cutting toenails the same way as fingernails. These resources provide comprehensive knowledge to support healthy nails throughout your entire beauty routine.
For those who love short nails, explore short nails square simple designs and cute short nails ideas as alternatives to press-on wear. Sometimes giving your nails extended breaks allows you to rock natural short nails with polish instead, which is less stressful on the nail plate while still delivering beautiful results. Clear short press-on nails offer a subtle option for days when you want minimal coverage.
Final Thoughts on Safe Press-On Nail Removal
Learning how to take off press-on nails safely is one of the most important skills for anyone who regularly wears them. The proper removal technique separates beautiful nail journeys from damaged nail disasters. Remember that patience is your greatest tool—rushing the process causes the damage you’re trying to avoid.
Implement the step-by-step guide provided in this article every time you remove press-on nails. Commit to proper aftercare with moisturizing treatments and appropriate waiting periods before reapplication. Your nails will reward your dedication with strength, health, and beauty. Over time, you’ll develop a removal routine that feels natural and efficient while protecting the precious nails underneath.
Whether you choose DIY removal or professional services, the key is consistency and care. Your natural nails are meant to be beautiful and strong. By mastering safe removal techniques, you unlock the full potential of press-on nail wear without sacrificing the health of your natural nails. Start implementing these methods today and experience the difference proper removal technique makes for your nail health and appearance.