
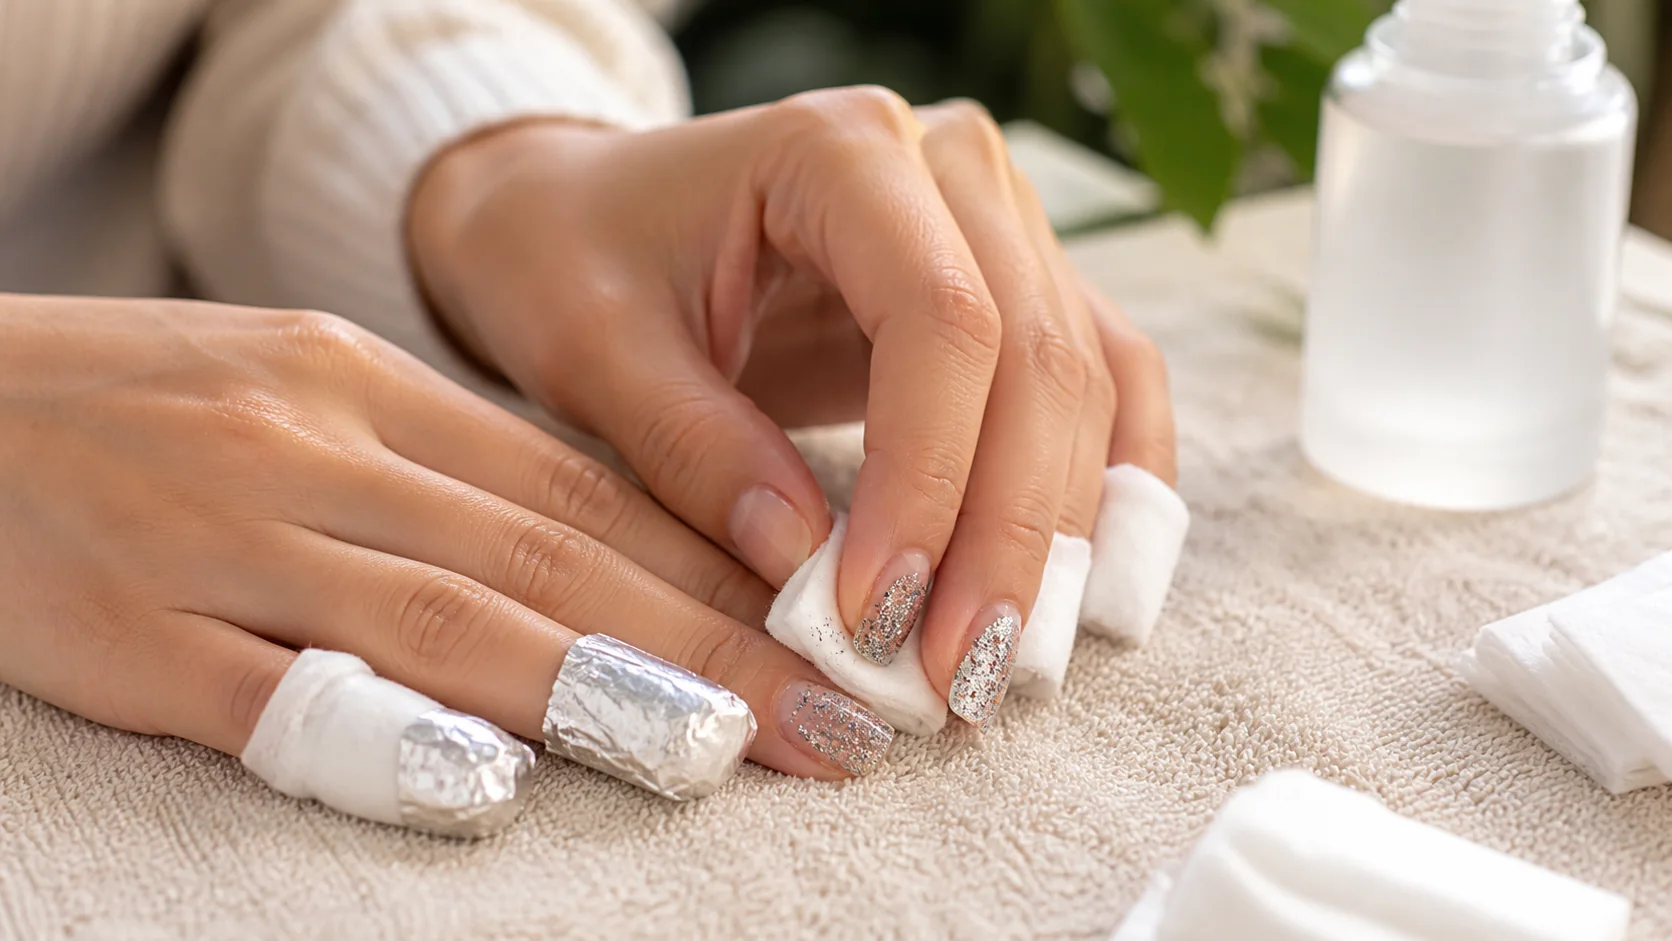
Glitter nail polish is difficult to remove because reflective particles interrupt an ordinary wipe and cling to layers of lacquer underneath. Scrubbing harder may seem faster, but loose glitter can drag across the nail like grit. Picking can also pull away surface layers of the natural nail.
The gentlest answer to how to remove glitter polish without damaging nails is to let remover dissolve the lacquer before you wipe. Nail-sized cotton pieces and snug wraps keep the remover in contact with the polish, reducing repeated rubbing.
First, Identify What Is on Your Nails
Removal depends on the product beneath the glitter.
- Regular glitter lacquer air-dries and usually comes off with nail polish remover.
- Gel glitter polish cures under a lamp and requires the removal process specified by its manufacturer.
- Glitter over acrylic, builder gel, or another enhancement may need professional removal to protect the structure underneath.
- Press-ons or wraps with glitter use adhesives with their own instructions and should not automatically be soaked like lacquer.
This guide focuses on regular glitter nail polish. If you are unsure what was applied, contact the salon or check the product label before reaching for acetone or a file.
Why Ordinary Wiping Does Not Work Well
A flat cotton pad makes contact with the uppermost glitter particles, but the pieces can shield polish below. As you rub, the softened color moves while the glitter catches against the cotton and nail. More rubbing creates more friction without giving the remover enough time to reach every layer.
A wrap changes the process from scrubbing to soaking. It holds wet cotton against one nail, slows evaporation, and gives the solvent time to soften the lacquer around the glitter.
What You Need
- Nail polish remover that can dissolve your regular lacquer
- Cotton pads or cotton balls
- Small pieces of aluminum foil, reusable removal clips, or plastic food wrap
- Petroleum jelly or a thick barrier ointment
- A towel to protect the work surface
- Hand cream and cuticle oil for aftercare
Acetone usually works faster on dense glitter than acetone-free remover, which can mean less rubbing but may feel more drying. An acetone-free formula may work for lighter glitter if you allow more contact time. Follow the remover label and stop if your skin becomes painful or very irritated.
Protect Your Skin and Workspace
Work in a well-ventilated area away from flames, heat, and smoking. Nail polish remover is flammable and can damage painted furniture, plastics, and some countertops. Cover the surface with a protective layer and a towel.
Wash and dry your hands. Apply a thin ring of petroleum jelly around each nail fold and fingertip, keeping it off the painted nail itself. Cut the cotton into pieces close to each nail’s size. Smaller pieces limit unnecessary remover contact with the skin.
Step-by-Step Foil or Clip Method
1. Saturate one cotton piece
Wet the cotton thoroughly with remover, but do not leave it dripping. It needs enough liquid to stay in contact with the full painted surface.
2. Place it directly on the glitter
Center the cotton on the nail and press it flat. Check that it reaches the sides and tip without covering more skin than necessary.
3. Secure the cotton
Wrap the fingertip snugly with foil or plastic food wrap, or fasten a reusable removal clip. The wrap should hold the cotton in place without squeezing painfully or restricting circulation.
4. Repeat one hand at a time
Working on one hand makes wrapping easier and reduces spills. It also lets you keep the second hand free to check each nail.
5. Wait without picking
Start with the contact time recommended on your remover. Dense regular glitter may need several minutes. Do not lift the wraps every few seconds, since opening them allows remover to evaporate.
6. Remove one wrap and test
Press the cotton against the nail, grip the wrap, and slide it toward the tip in one controlled motion. Most glitter should move with it. Avoid twisting the glitter back and forth across the nail.
7. Rewrap stubborn areas
If a patch remains firmly attached, place fresh remover on the cotton and rewrap that nail for a little longer. Patience is safer than scraping. Use a clean section of cotton for the final light wipe so removed glitter is not dragged back over the surface.
Foil, Plastic Wrap, or Removal Clips?
All three options can hold cotton in place.
- Foil is easy to shape and widely available.
- Plastic food wrap can form a close seal and lets you see the cotton position.
- Reusable clips reduce waste and are convenient, but they must fit without excessive pressure.
The best choice is the one that maintains full contact without leaking or hurting. Do not apply external heat to acetone wraps or place your hands near a flame.
What If You Do Not Want to Use Acetone?
An acetone-free remover can work on some regular glitter polishes, especially toppers with only one or two layers. Use the same cotton-wrap method and expect a longer contact time. If you find yourself scrubbing repeatedly, a shorter targeted acetone application may create less mechanical friction than a long battle with a weaker remover.
Do not substitute household solvents. Use a product labeled for nail polish removal and follow its safety directions.
Do Not Scrape, Peel, or Buff Off Glitter
A metal tool, rough file, or another fingernail can lift natural nail layers along with the polish. Even an orange stick can create pressure marks if used to force off stubborn particles.
Buffing is also unnecessary for regular glitter lacquer. It thins the nail surface and spreads glitter dust. If lacquer does not soften after a reasonable wrap, confirm that it is not a gel or enhancement product rather than reaching for a coarser file.
Aftercare for Dry Nails and Skin
After the polish is gone, wash your hands gently to remove residue and pat them dry. Apply cuticle oil around the nail folds and massage hand cream over the fingers and nails. If skin feels very dry, add a thin layer of fragrance-free ointment at bedtime.
Acetone can temporarily leave nails and skin looking chalky or dry. Moisturizing helps restore comfort, but it cannot repair nail layers removed by peeling or scraping. That is why gentle removal is more important than any aftercare product.
For additional polish removal and maintenance routines, explore the Glow Finds Daily nail guides.
How Soon Can You Repaint?
If your nails are smooth, comfortable, and healthy, you can repaint when they are clean and dry. Remove oily aftercare residue from the nail plate before applying a new base coat. If the nails feel tender, look peeled, or the surrounding skin is irritated, take a break and allow the area to recover.
Never cover unexplained discoloration, pain, swelling, or a damaged nail with fresh polish. Seek professional advice if symptoms persist or worsen.
Make Future Glitter Removal Easier
Use a suitable base coat
A regular base coat can reduce staining and create a more even foundation. A peel-off base makes removal easier, but wear time may be shorter and the product must be peeled according to its directions. Never force off a section that remains firmly attached.
Use glitter strategically
A glitter topper over a solid color may be easier to remove than several dense glitter coats. You can also use glitter on an accent nail instead of every finger.
Keep layers thin
Use the fewest coats needed for the desired effect. Thick stacks take longer for remover to penetrate.
Remember the product name
Keep a note or photo of the bottle. Knowing whether the product is regular lacquer, gel, a textured topper, or a specialty effect prevents removal guesswork later.
Common Removal Mistakes
- Rubbing dry cotton back and forth across glitter
- Using one dirty cotton section for every nail
- Cutting cotton pieces much larger than the nail
- Peeling polish with another fingernail
- Scraping stubborn glitter with a metal tool
- Filing the natural nail to remove regular lacquer
- Leaving remover open near heat or flames
- Assuming gel glitter and regular glitter use the same removal method
When to Stop and Get Professional Help
Stop if removal causes burning, marked redness, pain, bleeding, or swelling. Get professional help if the product will not soften, if you suspect acrylic or hard gel underneath, or if the natural nail begins lifting from the nail bed.
A nail professional can identify the coating and select the correct removal system. A dermatologist can assess persistent irritation, rash, nail separation, or signs of infection.
Frequently Asked Questions
How long should glitter polish stay wrapped?
Follow the remover label and test one nail after several minutes. Coat thickness, glitter size, remover strength, and wrap quality all affect timing. Rewrap a stubborn patch instead of scraping.
Can I soak my fingertips in a bowl of acetone?
Targeted cotton pieces reduce how much skin contacts remover and usually use less liquid. For regular glitter polish, a wrap is the more controlled starting method.
Why are my nails white after acetone?
Acetone removes surface oils and can leave temporary chalky dryness. Wash gently and moisturize. If white spots remain within the nail, the surface may have been damaged by scraping or peeling.
Can I remove glitter with a peel-off base coat?
A peel-off base must be applied before the glitter. At removal, follow that product’s directions. Do not force attached sections, since aggressive peeling can disturb the nail surface.
Is it safe to use a wooden stick on leftover glitter?
Do not pry or scrape. If glitter remains bonded, give the remover more contact time. A final gentle wipe with fresh cotton is safer than pressure from a tool.
The Bottom Line
To remove glitter polish without damaging nails, soften regular lacquer with remover-soaked, nail-sized cotton held in place by a wrap or clip. Slide the cotton off in one controlled motion, rewrap stubborn spots, and avoid scrubbing, scraping, filing, or peeling. Confirm the product type first, protect the surrounding skin, ventilate the room, and finish with moisturizing aftercare.